Before You Print
Before you slice or print, make sure every head is fitted with the correct type of nozzle at the right diameter for the task it will do. Mixed-nozzle work in FOrcaSlicer only pays off when the hardware matches your plan - a fine nozzle where you want surface detail, a coarse one where you want speed or strength.
The hardware side of this - which hot ends exist, how to swap one, and how to tell the printer what is installed - is Snapmaker's own material, documented in their official guide. This page follows its four steps and summarizes them in our own words; Software Configuration (step 4) is where FOrcaSlicer diverges.
Source and freshness. Sections 1-3 below summarize Snapmaker's official U1 Hot End Replacement and Configuration guide (captured 2026-06-04). Always treat the official page as authoritative - our summary is a convenience and may be out of date. The step images in section 3 are Snapmaker's own, linked directly from their wiki, and may change or move.
1. Selection Guide
Please refer to the official Selection Guide for the full compatibility tables. The summary below is a captured copy and may be outdated.
The U1 ships with 0.4 mm stainless steel hot ends. Hardened steel hot ends are sold separately in 0.2, 0.4, 0.6, and 0.8 mm. Pick by material and by diameter:
- Material - stainless steel for non-abrasive, general-purpose filaments; hardened steel for abrasive or particle- and fiber-filled materials that would wear a softer nozzle.
- Diameter - smaller for detail and finish, larger for speed, flow, and strength.
All U1 hot ends handle up to 300 C. A rough guide by diameter:
| Nozzle | Best for | Typical layer height | Notes |
|---|---|---|---|
| 0.2 mm | Miniatures, fine text, logos, molds | ~0.05 - 0.12 mm (approx. 0.1) | Non-abrasive filaments only |
| 0.4 mm | General models, toys, mechanical, decorative parts | ~0.1 - 0.3 mm (approx. 0.2) | Ships as stainless; hardened available |
| 0.6 mm | Larger functional and structural parts, high-flow filaments | ~0.15 - 0.45 mm (approx. 0.3 - 0.4) | Faster, less fine detail |
| 0.8 mm | Large structural, high-strength parts, low-viscosity filaments | ~0.2 - 0.6 mm (approx. 0.4 - 0.5) | Basic detail, coarser layer lines |
Layer height on the U1 runs roughly 25 - 70% of the nozzle diameter (25 - 60% for the 0.2 mm). FOrcaSlicer enforces this as a clamp on the smallest nozzle in use - see First Launch and Known Limitations.
Check the layer-height range when you create a printer preset (PTP)
When you create a new PTP, FOrcaSlicer currently inherits a single layer-height range from the base PTP you start from, by nozzle size. The inherited defaults are:
| Base PTP | Layer height min (mm) | Layer height max (mm) |
|---|---|---|
| 0.2 mm nozzle | 0.04 | 0.14 |
| 0.4 mm nozzle | 0.08 | 0.32 |
| 0.6 mm nozzle | 0.12 | 0.42 |
| 0.8 mm nozzle | 0.16 | 0.56 |
Inspect these min and max values before you save a PTP. They set the range the smallest-nozzle-in-use clamp reads from, so a wrong inherited range will reject or auto-adjust layer heights you did not expect.
Notes (edited for FOrcaSlicer - wording differs from the official guide):
- Snapmaker's firmware does not support mixing nozzle diameters in a single print job. FOrcaSlicer works around this by sending mixed-nozzle jobs directly from the slicer; the printer touchscreen still cannot start one. See Known Limitations.
- Snapmaker advises against pairing a 0.2 mm hardened steel hot end with TPU 95A HF - use 0.4 mm or larger for that filament.
2. Hot End Replacement
Please refer to the official Hot End Replacement steps. The summary below is a captured copy and may be outdated.
The physical swap - powering down, releasing the old hot end, and seating the new one - follows Snapmaker's U1 hot end replacement procedure. There is no FOrcaSlicer difference here. Snapmaker also provides a video walkthrough ("Ceramic Heater & NTC Thermistor Replacement") that covers the related steps. Follow the official guide or the video directly.
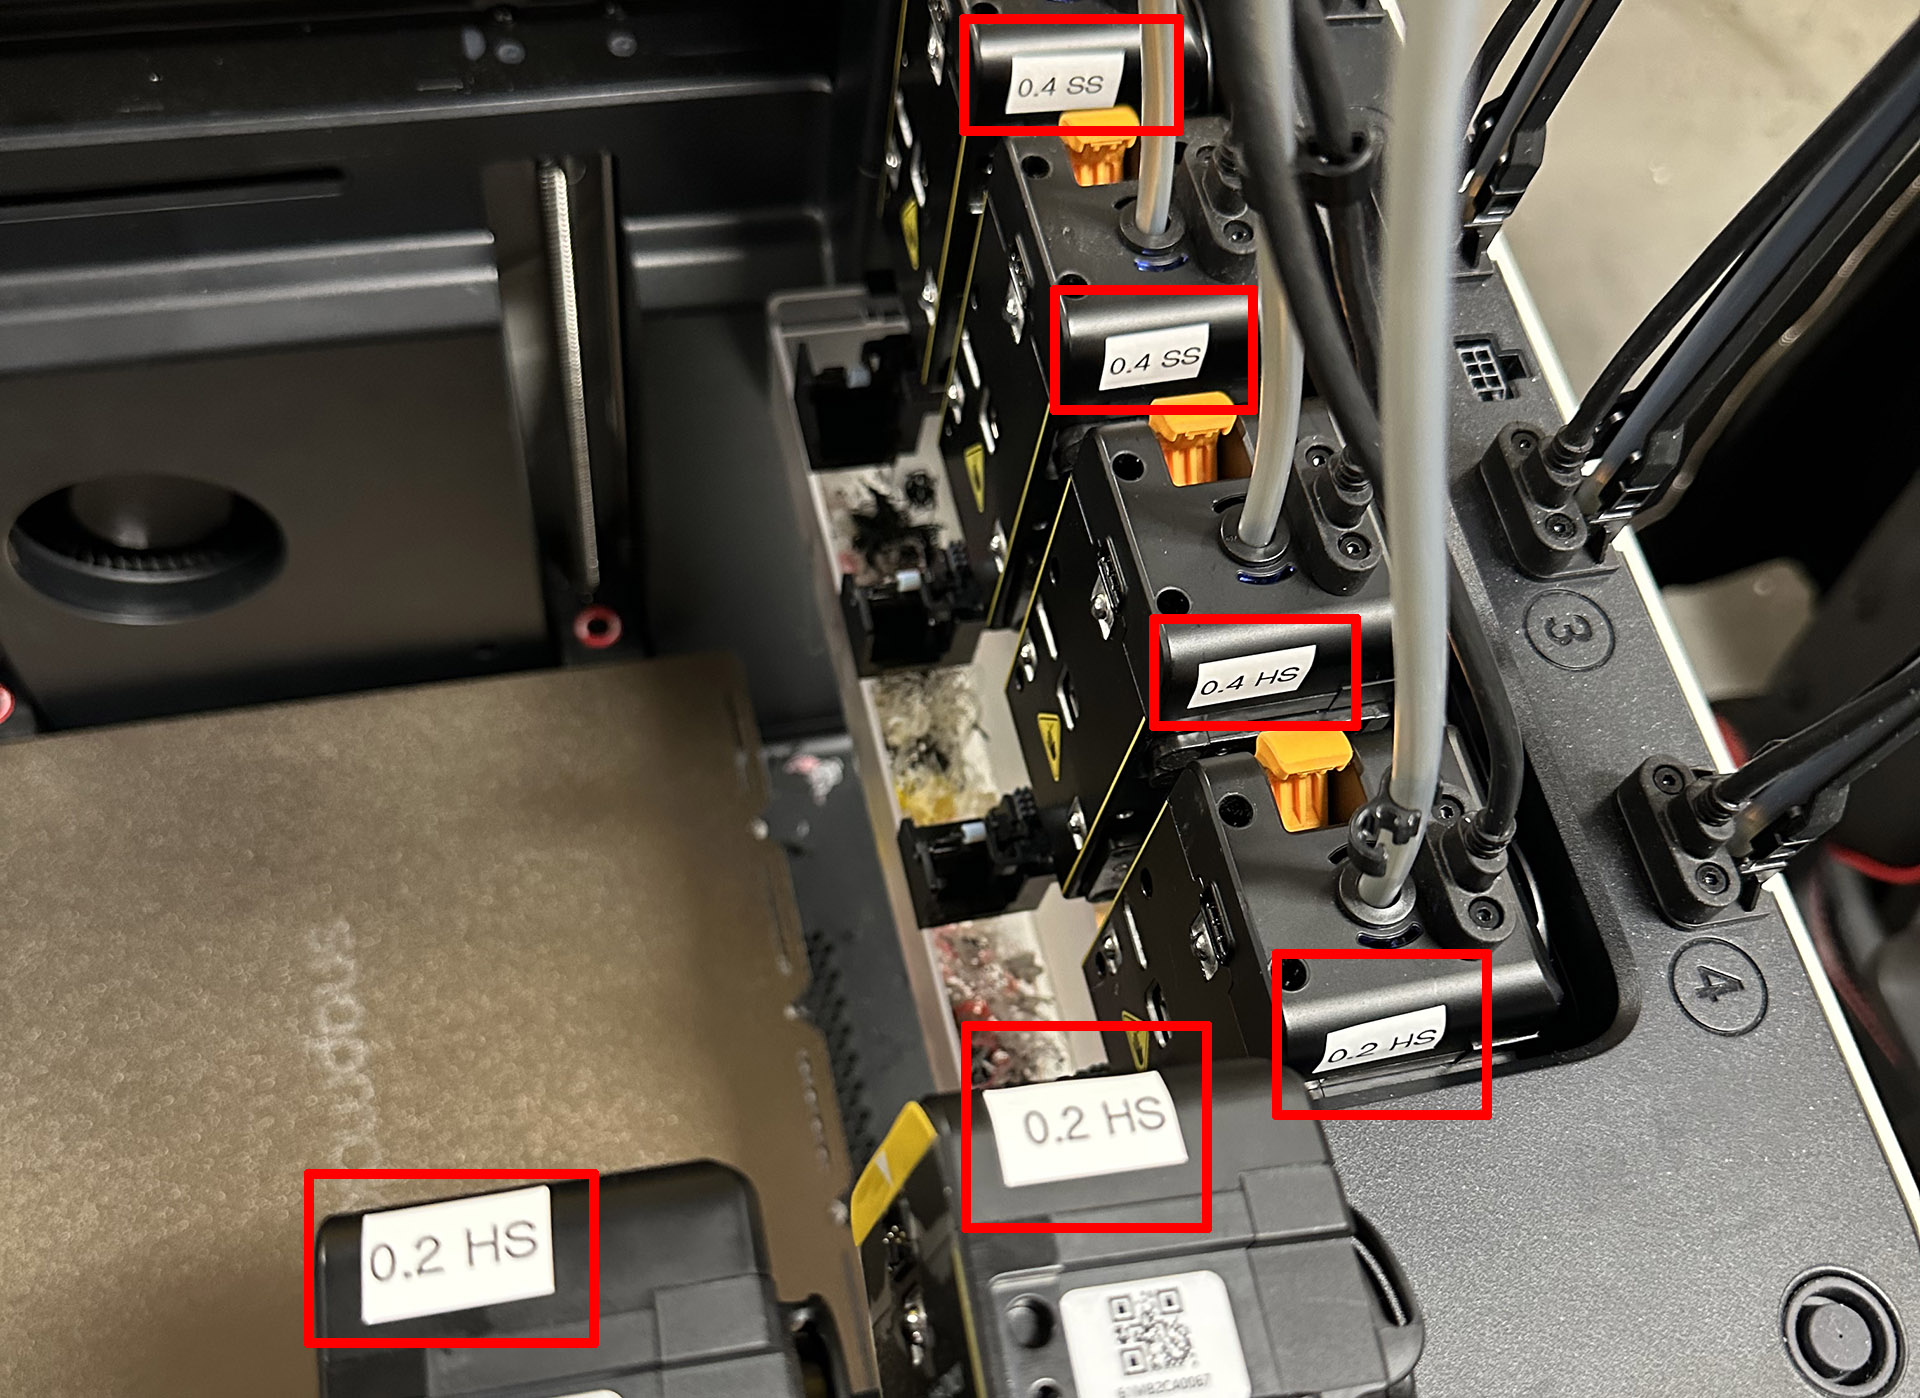
Tip: label your toolheads. Once a nozzle is installed, its diameter and material are invisible from the outside - even with the cover off. So the moment you make your first swap, start labeling. Mark every toolhead with its nozzle diameter and material, even when all four are the same size, since identical diameters can still be different materials. A clear label on each head lets you confirm your printer's arrangement at a glance - which is exactly what the Verify nozzle sizes step at print time asks you to do.
3. Firmware Configuration
Please refer to the official Firmware Configuration steps. The summary below is a captured copy and may be outdated; the images are Snapmaker's own, linked from their wiki.
Firmware V1.3.0 or higher is required. Update through the touchscreen, or from Snapmaker's U1 Firmware Release Notes. After replacing a hot end, do the following on the printer's touchscreen.
Set the nozzle diameter. From the home screen, open Settings, then Maintenance > Toolhead Info, and set the diameter to match the hot end you installed.
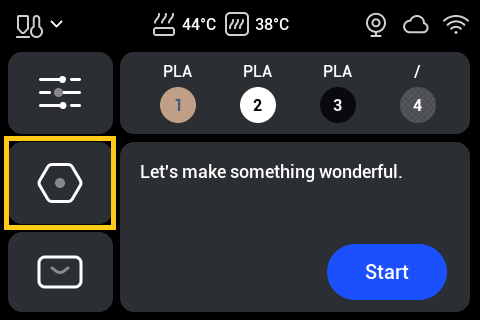
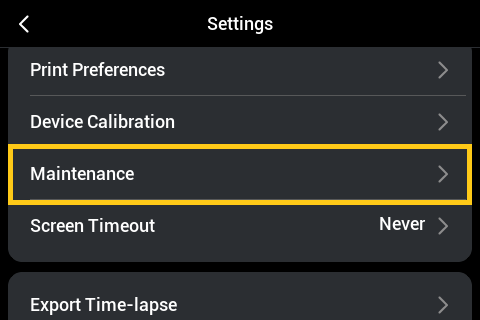
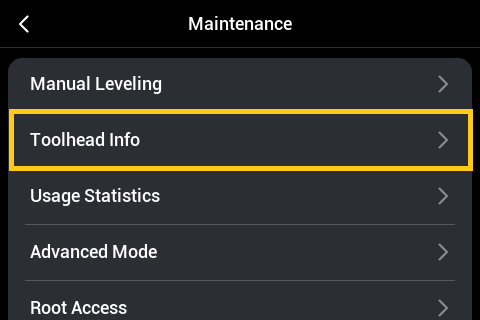
If the installed nozzle diameter does not match the diameter in the sliced file, the touchscreen shows a warning pop-up.
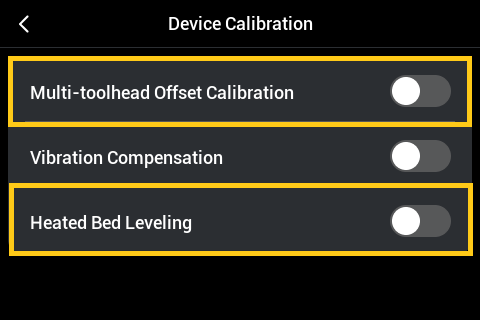
Re-run calibration. From the home screen, open Settings > Device Calibration, then re-run Multi-toolhead Offset Calibration and Heated Bed Leveling.
FOrcaSlicer limitation: because the U1 firmware does not support mixing nozzle sizes, you cannot start a mixed-nozzle job from the printer's touchscreen - send it directly from FOrcaSlicer instead. See Known Limitations.
4. Software Configuration
This is where FOrcaSlicer differs from the official guide.
The official guide has you press "Synchronize nozzle information" in the slicer to pull the nozzle setup from the printer. Do not use that button in FOrcaSlicer. Snapmaker's firmware does not support mixing nozzle sizes, so synchronizing will overwrite your per-nozzle setup with a single uniform diameter and undo your mixed-nozzle configuration.
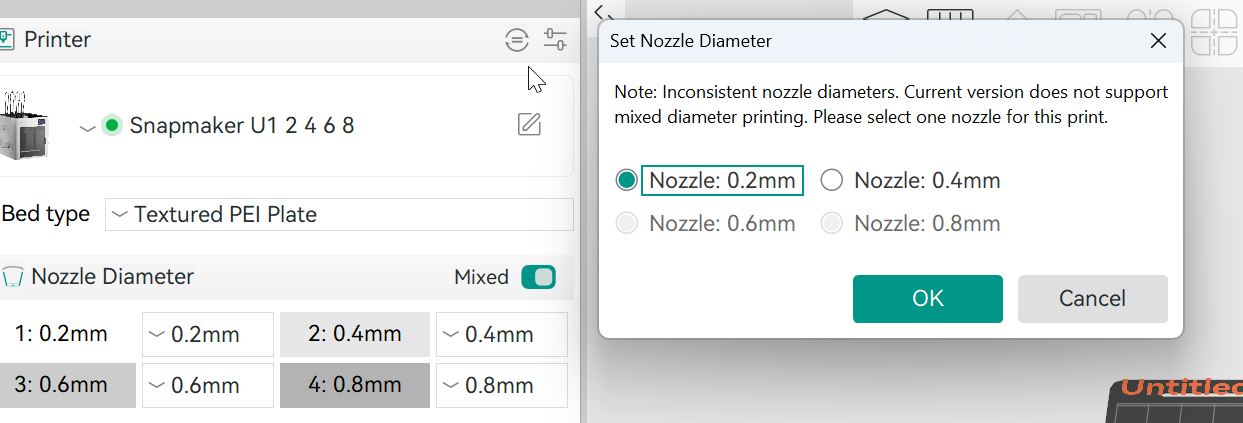
Instead, set your nozzle diameters and assign features manually in FOrcaSlicer. The steps - selecting the U1 preset, turning on Mixed mode, setting each nozzle's diameter, and assigning features - are on the First Launch page under "Setting up mixed nozzles."